
Human Resources
Page Navigation
- Manasquan Public School District
- Employee Portal
-
Employee Portal
The Manasquan School District's Employee Portal is an electronic interface that enables employees to manage their contact information, view attendance records, perform payroll functions (submit timesheets, view pay stubs), submit electronic forms, and participate in their evaluation process, among other features.
Contracted Employees - Login Here
If you login with an @manasquan.k12.nj.us email address.
Casual Employees & Volunteers - Login Here
If you login with your personal email address.
Click any of the employee portal help topics below for instructions or tips on using the portal.
-
Accounts and Logging In
District employees who have a district login (typically contracted employees with a @manasquan.k12.nj.us email address) will login to the portal with their district active directory username and password. This is the same account that these employees use to access district computers, email, etc. Since these credentials are shared with other services, passwords can only be reset using a district computer or contacting the Technology Department.
Casual employees without a district login (typically substitutes, coaches, etc.) will login to the portal with their own personal email address and a password they have set. If this passsword is forgotten, the 'I have forgotten my password' link on the portal login page can be used to have a temporary password sent to the email address on file.
-
Electronic Signature Setup
Electronic signatures are used in the employee portal to sign documents like timesheets, forms, etc. Employees need only actually set up their electronic signature once and will then use a PIN they set to apply that signature to documents.
To set up an electronic signature:
- Login to the Employee Portal.
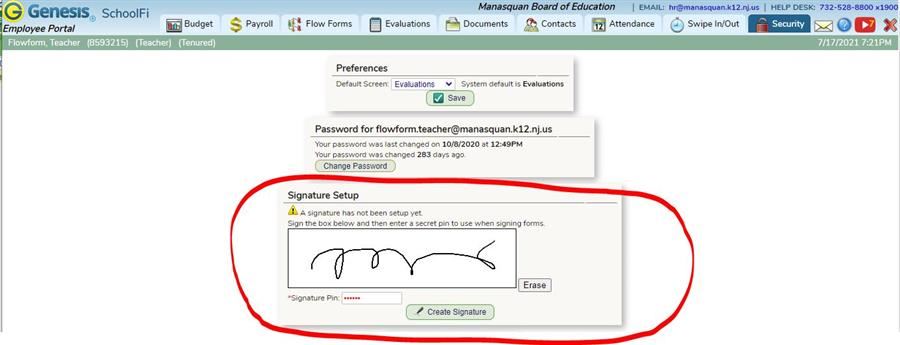
- Click the Security tab.
- In the Signature Setup area of the page, make an electronic signature in the white box using either your touch screen or mouse.
(You can make multiple attempts at this if you choose by clicking the 'Erase' button to clear the white box and try again.) - Once you are satisfied with your signature, enter a PIN in the 'Signature Pin' field.
REMEMBER YOUR PIN! You will need it each time you sign a document. If you forget it, it can only be reset for you by contacting human resources. - Click the 'Create Signature' button to set your signature and PIN.
Once your electronic signature is established, you will be prompted to enter the PIN you set to apply your electronic signature to a document.
A short video demonstration of this process is also available here:
-
Employee Contact Records
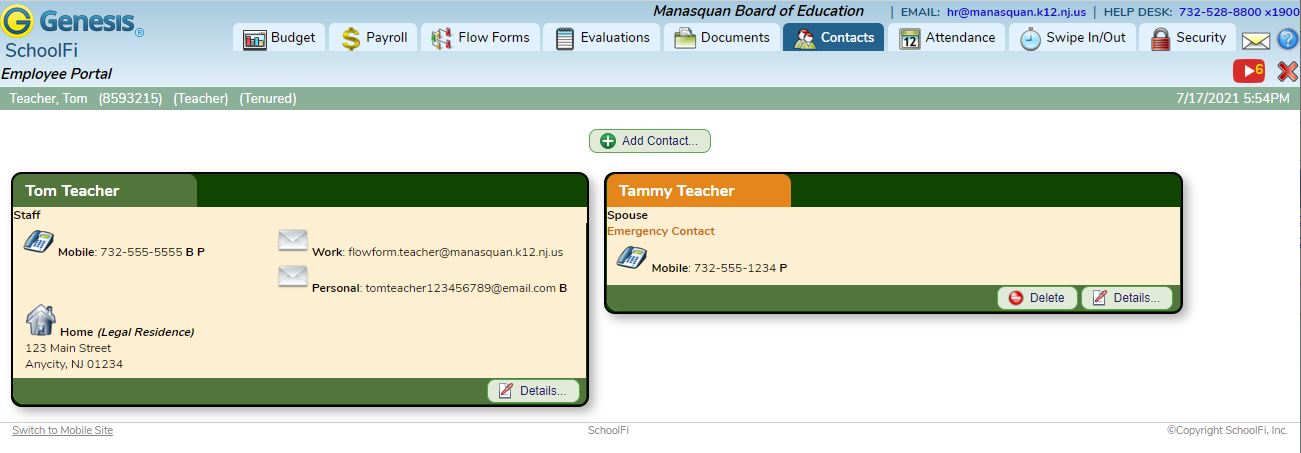
Employee contact records can be found on the Contacts tab of the employee portal. Every employee has at least one contact record (themselves) and should have at least one emergency contact record.
Here you will see an example of the Contacts tab. Notice the employee's contact record is in green and the employee's emergency contact is in orange.
Update the Employee Contact Record
Employees can update the phone number(s), personal email address(es), and home address of their own contact record using the portal.
To edit these records, click the 'Details...' button at the bottom of the employee's own contact card.
Here, the employee can:
- Add, update, or delete personal email address in the 'Email Addresses' section.
- After editing an existing email address, be sure to click the 'Update Emails' button.
- Add, update, or delete phone numbers in the 'Phone Numbers' section.
- After editing an existing email address, be sure to click the 'Update Phone Numbers' button.
- Update their mailing address(es) in the 'Addresses' section.

Adding an Emergency Contact
Every employee is required to have at least one emergency contact.
To add an emergency contact:
- From the Employee Portal Contacts tab, click the 'Add Contact' button.
- Enter the first name, last name, and relationship of the emergency contact in the form that appears. Also, be sure to check the Emergency Contact box to indicate the person is to be used as an emergency contact. Then click the 'Add' button.
- Once the emergency contact has been added, you will be taken to their Contact Demographics screen. This screen is similar to the employee's own contact details described above.
- For an emergency contact, be sure to at minimum enter a phone number by clicking the 'Add Phone Number' button.
- Once a phone number has been added, the required information for your emergency contact has been added, and the employee can click the Contacts tab to return to view all of their contact cards.
These steps are also summarized in a short video demonstration here.
Updating an Emergency Contact
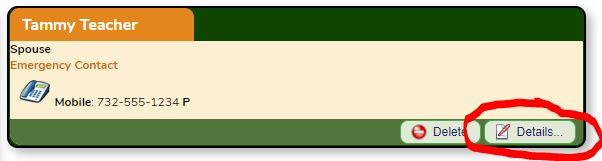
Employees can update any of the information for an emergency contact record.
To edit an emergency contact records, click the 'Details...' button at the bottom of the emergency contact's contact card:
Here, the employee can:
- Add, update, or delete email address(es), phone number(s), or address(es) in each respective section.
- After editing an existing email address, phone number, or address, be sure to click the respective 'Update...' button.
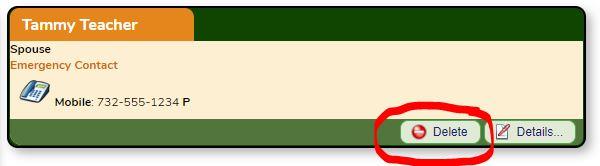
Delete an Emergency Contact
Employees can delete an emergency contact record from their Contacts tab by clicking the 'Delete' button at the bottom of the contact card of that individual:
- Add, update, or delete personal email address in the 'Email Addresses' section.